The inside of a car collects crumbs, grit, sand, dog hair and dust in places a household vacuum cannot reach and a duster cannot get into: down the sides of the seats, along the seat rails, in the air vents and around every button. Cleaning it yourself is mostly a matter of having the right few tools and doing the job in the right order. This guide explains how to choose a car vacuum, whether cordless or one that runs from the 12V socket, what the figures on the box mean and which attachments earn their place. Then it sets out a cleaning order that works and goes through each part of the car in turn: the seats, the vents and buttons, the dashboard and screens, and finally the mats and the boot.
Cordless or 12V: which suits you
Car vacuums come in two kinds, and the difference is where the power comes from. The choice is really about how and where you clean.
Cordless vacuums
A cordless vacuum has a rechargeable battery built in. You charge it at home or in the car, then take it anywhere: the driveway, the car park at the beach, the back of a van, or the house when something gets spilled on the sofa. There is no cable to trail over the door sills or to catch on the seat belts, and you can clean the boot and the back seats without working out how far the cable will stretch.
The limits are the battery. A cordless vacuum runs for a set time on one charge, and that time is given in the product description, so read it before you buy and think about how long a full clean of your car takes you. One that charges from a USB-C cable can be topped up in the car as well as at home. Keep it indoors between uses rather than in the boot through a hot summer or a freezing night.
12V vacuums
A 12V vacuum plugs into the car's 12V socket, the one that used to be the cigarette lighter. It runs for as long as the car supplies power, with no battery to charge and nothing to forget. That suits a long, thorough clean, or a van where the job is bigger than one charge of a small battery.
Two things are worth checking. The first is the length of the cable. The socket is usually at the front of the car, and the cable has to reach the furthest corner of the boot. Measure that distance in your own car and compare it with the cable length given for the vacuum. The second is the car's battery. With the engine off, a 12V vacuum runs from the car battery, and a long session can leave it too flat to start the car. In many cars the socket only works with the ignition on in any case. Keep sessions short with the engine off, and do not leave the engine running for the sake of the vacuum: the Highway Code says you must not leave an engine running unnecessarily while the vehicle is stationary on a public road.
Which to choose
| If you mostly... | The kind that tends to suit |
|---|---|
| do quick tidy-ups of crumbs and grit between proper cleans | Cordless: it is out and working in seconds |
| clean the car somewhere away from home | Cordless, charged before you go |
| do one long, thorough clean on the drive | 12V, or a cordless one with a long run time |
| clean a van cab and load area | 12V with a long cable, or cordless with a spare charge |
The car vacuum cleaners range has both kinds. If you prefer to keep everything in the car to one power source, the cordless and rechargeable and 12V accessories pages gather the products that run each way.
Suction, filters and the numbers on the box
Car vacuums are described with a handful of figures. They are worth understanding, because the same vacuum can sound powerful or weak depending on which number you read.
Pascals (Pa)
A figure in pascals, written Pa or kPa for thousands of pascals, is a pressure. On a vacuum it describes how hard the motor can pull. A higher figure means a stronger pull on grit and sand worked deep into carpet. It does not, on its own, say how much air moves through the nozzle, and it is the moving air that carries crumbs and dust up into the bin.
Air watts
Some vacuums give a figure in air watts. This is an attempt to describe suction and airflow together in one number, so it is a closer guide to how well the vacuum picks things up than pressure alone.
Watts
A figure in plain watts is usually the power the motor uses, not what it achieves. Two vacuums that use the same power can clean quite differently, so a big wattage is a sign of how much electricity a vacuum draws, not how good it is.
Comparing them
Compare like with like: pascals with pascals, air watts with air watts. All of them are the maker's own measurements, so weigh them alongside the attachments and the run time.
Filters
Every car vacuum has a filter between the bin and the motor. It stops fine dust going straight through the motor and back out into the car. Most are washable, and a clogged filter is the most common reason a vacuum seems to lose its suction, because air cannot pass through it freely. Empty the bin after each clean and rinse or tap out the filter as the instructions say, letting it dry completely before you put it back.
Some filters are described as HEPA. In the United States, the Environmental Protection Agency describes a HEPA filter as a pleated filter that can in theory remove at least 99.97% of particles 0.3 microns in size, which includes dust and pollen. If fine dust matters to you, for example because someone in the car has hay fever, look for a filter described as HEPA and check how it is cleaned or replaced.
Wet and dry
Some car vacuums are described as wet and dry, and can pick up liquid. Never use a vacuum made only for dry dirt on a spill.
The attachments that matter
The nozzle a vacuum comes with matters as much as its motor, because most of the dirt in a car is in corners, not on open floor.
- A crevice tool. A long, narrow nozzle that reaches down the sides of the seats, between the seat and the centre console, into the door pockets and along the seat rails. If you only use one attachment, this is it.
- A brush tool. A nozzle with soft bristles round the opening, for the dashboard, the vents, the door cards and the seats. The bristles loosen dust while the vacuum takes it away, without scratching.
- A wider upholstery nozzle. Covers the seat cushions and the carpet faster than a crevice tool.
- A flexible hose. Lets you hold the vacuum in one hand and steer the nozzle under the seats or into the footwells without twisting your wrist.
- A rubber or bristle pet hair head. Dog hair weaves itself into car carpet and seat fabric. A head with rubber nubs or stiff bristles drags it out where a plain nozzle slides over it.
A light on the front helps more than it sounds, because the footwells are dark even in daylight.
A cleaning order that works
The rule is top to bottom and out before in. Dust and crumbs fall, so if you vacuum the carpet first and then brush the dashboard, you will be vacuuming it again. Park in the shade with the engine off.
- Empty the car. Take out everything that does not live there: bags, bottles, receipts, toys and rubbish. A car bin keeps rubbish from spreading in the first place.
- Take the mats out. Lift out every floor mat and the boot liner if there is one, and set them aside. They get cleaned on their own later.
- Dust and brush from the top. Start at the dashboard, the vents, the door cards and the centre console, brushing dust down towards the floor.
- Vacuum the seats. Work from the headrests down to the cushions, then the gaps between and beside the seats.
- Vacuum the carpet. Slide each front seat all the way forward to reach behind it, then all the way back to reach in front, and do the seat rails as you go.
- Wipe the hard surfaces and the screens with a damp microfibre cloth, then a dry one.
- Clean the inside of the glass last, so the dust from everything else is not left on it.
- Clean the mats and put them back. Make sure the driver's mat is on its fixings before you drive.
If you want everything for that list in one go, an interior cleaning kit puts brushes, cloths and cleaners together.
Seats and fabric
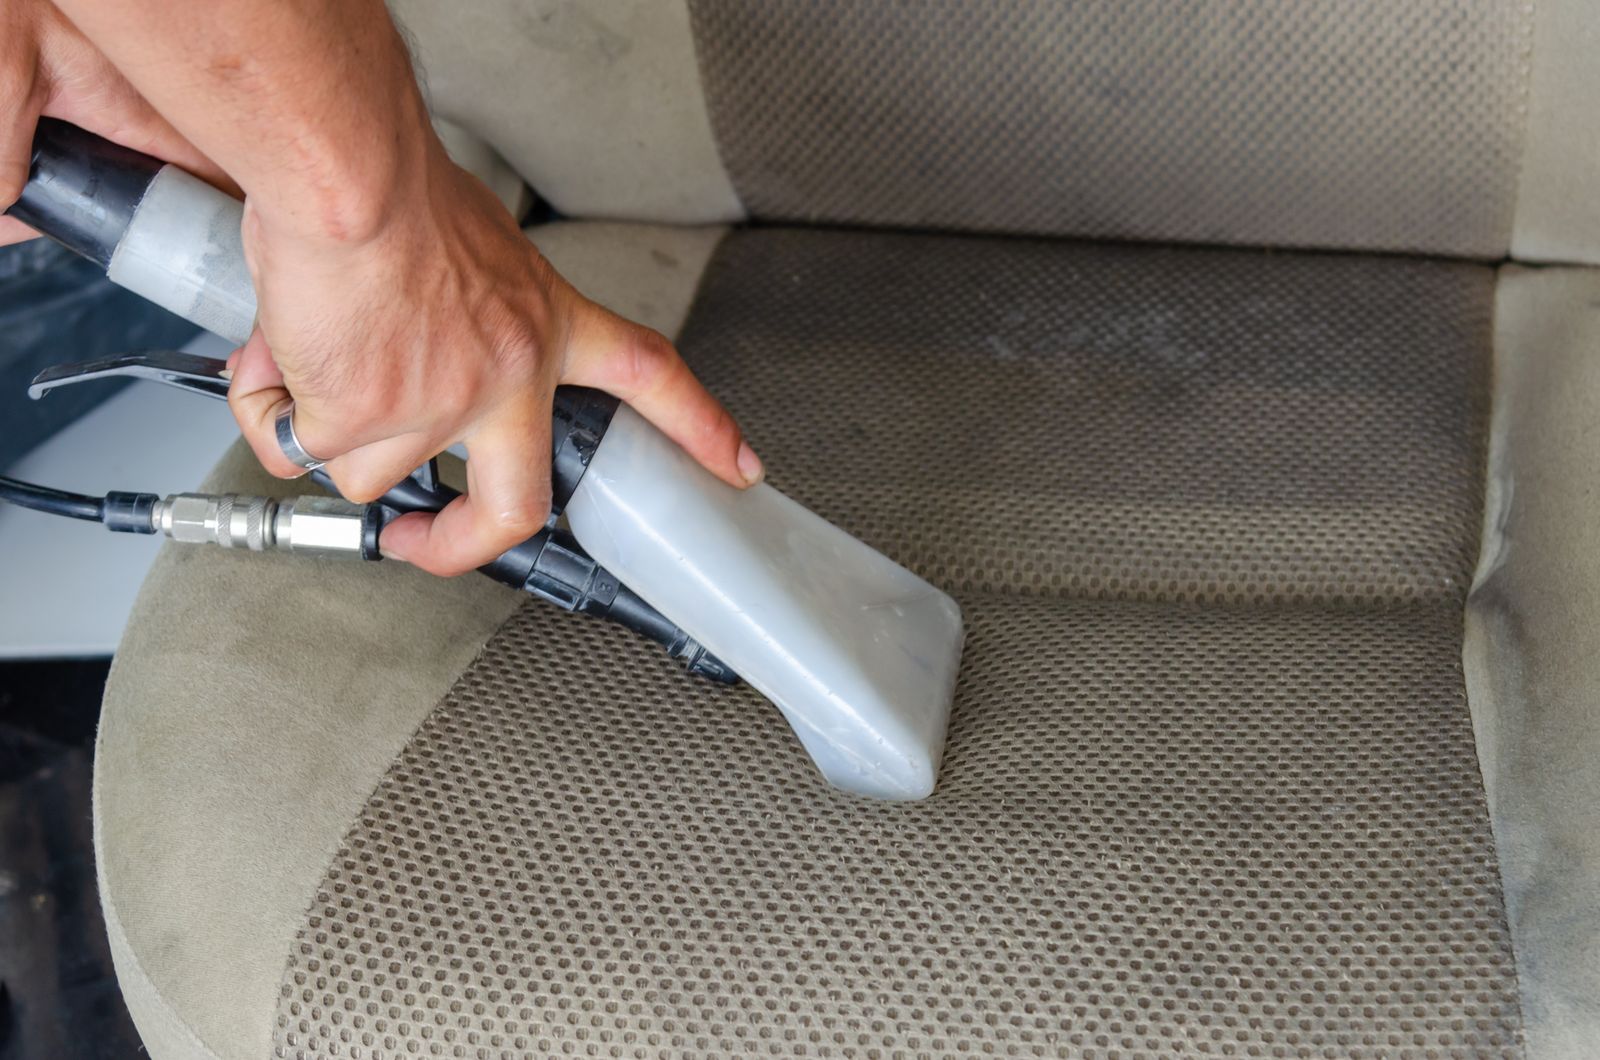
Fabric seats hold more dirt than they show. Vacuum them with the brush tool, pressing lightly so the bristles lift grit from the weave, and use the crevice tool along every seam, where crumbs collect. Push the back of the seat cushion down a little to open up the gap between the cushion and the backrest, which is where coins, crumbs and hair hide.
Dog hair
Dog hair is the hardest thing to shift from car fabric. A pet hair head on the vacuum helps, and so does going over the seat first with a damp rubber glove, wiping in one direction to roll the hair into clumps the vacuum can take. Once the seats are clean, a cover keeps them that way: dog seat covers and hammocks catch the hair and mud before it reaches the seat, and can be taken out and shaken.
Spills and stains
Blot a spill straight away with a dry cloth, pressing rather than rubbing, because rubbing pushes it deeper. If a stain is left, use an upholstery cleaner and try it first on a small hidden area. Use as little water as you can. The foam inside a car seat dries slowly, and a seat that stays damp can start to smell. Leave the doors or windows open to let it dry before you shut the car up.
Leather and leather-look seats
Leather and leather-look seats usually need only the soft brush and a damp microfibre cloth. For anything more, use a cleaner sold for that material and follow the car's handbook. Avoid soaking the seams.
Under child seats and covers
If you take a child seat out to clean beneath it, refit it exactly as its own instructions say before it is used again. A seat protector under a child seat catches most of the mess and stops the seat marking the car's upholstery. For a car that often carries mud or wet clothes, waterproof seat covers save a lot of cleaning. The guide to choosing car seat covers explains how to choose and fit them.
Vents, buttons and gaps: brushes and cleaning gel
The air vents, the buttons on the dashboard and steering wheel, the gear lever surround and the edges of the cup holders all collect dust that neither a vacuum nozzle nor a cloth can reach. Two tools deal with it.
Detailing brushes
Detailing brushes are small, soft-bristled brushes of different widths, a bit like a make-up or paint brush. Work the bristles into the slats of a vent, round the edge of each button and into the seams of the dashboard, and hold the vacuum nozzle next to the brush as you go so the dust goes straight into it rather than settling somewhere else. A brush is also the gentlest way to clean the textured plastic on many dashboards and doors, where dust sits in the grain.
Cleaning gel
Cleaning gel is a soft, sticky putty. Press it into a vent or over a row of buttons and peel it away slowly, and the dust and crumbs come away with it. It works best on small, awkward areas: the vents, the cup holders, the gap round the gear lever and the speaker grilles. Use it a piece at a time and do not leave it sitting in one place. Keep it in its sealed pot between uses and out of a hot car, because warm gel is softer and more likely to leave a residue behind. Once it turns dark with dirt, it is time for a new pot.
Keep liquid away from switches
Never spray a cleaner straight into a vent or onto the switches. Liquid can run into the electrics behind them. Put the cleaner on a cloth or a brush and wipe instead. The cleaning gel and detailing brushes range covers both tools.
Dashboards and screens: microfibre cloths
Microfibre cloths are made of very fine fibres that pick up and hold dust rather than pushing it around, and they are soft enough not to scratch plastic, glass or screens. Use one slightly damp cloth to lift the dirt and a dry one to finish. Keep separate cloths for the glass, so that they never pick up any dressing or polish from the dashboard.
The dashboard
Wipe the dashboard with a damp cloth, then dry it. If you use a dashboard product, choose one with a matt finish and use it sparingly. A shiny dashboard reflects in the windscreen, and that glare is the last thing you want when driving towards a low sun. Treat the areas marked as airbag covers gently: wipe them, never stick or rest anything on them.
The car's screens
The touchscreen and the instrument display are the most delicate surfaces in the car. The car's handbook usually says how to clean them. Unless it says a particular cleaner is safe, use only a dry or barely damp microfibre cloth, and wipe gently with the screen switched off so you can see the smears.
The inside of the windscreen
The inside of the windscreen slowly gathers a film from the air in the car, from fingers and from the dashboard itself. It shows up as glare when the sun is low and as smears when the headlights of oncoming cars hit it, and a grubby screen mists up more readily. The Highway Code says windscreens and windows must be kept clean and free from obstructions to vision, and in winter that you must be able to see and that the windows should be demisted thoroughly before you set off. Clean the inside of the glass with a glass cleaner on a clean microfibre cloth, then buff it dry with a second one. A cloth wrapped round your hand reaches the bottom corners of the windscreen better than one held flat. The microfibre cloths range has cloths for the glass and for the rest of the car.
Never on the controls you hold
Do not put any shiny or slippery product on the steering wheel, the gear knob, the pedals or the driver's floor mat. All of them need to grip.
Mats and the boot
Floor mats take most of the dirt that comes into the car, and they are much easier to clean out of it.
Rubber mats
Rubber mats can be knocked against a wall to shake out the grit, then hosed or washed with warm soapy water and a brush. Let them dry before they go back. Rubber car floor mats with raised edges hold water and mud in the mat rather than letting it soak into the carpet, which makes them the easier choice for winter, for a work vehicle or for anyone who walks a dog.
Carpet mats
Carpet mats need a firm shake to loosen the grit, then a slow vacuum in two directions to lift the pile. If a mat is worn through at the heel, universal car floor mats replace it.
Putting the driver's mat back
The driver's mat needs particular care. America's road safety regulator, the National Highway Traffic Safety Administration, has warned that a floor mat that is not secured can slide forward and trap the accelerator pedal, and that one mat should never be laid on top of another, because the fixings can only hold the bottom one. Put the driver's mat back on the car's own clips or hooks as the car's maker intends, and check that it cannot slide towards the pedals before you drive. The guide to choosing car floor mats goes into this in more detail.
The boot
Lift the boot floor if it lifts and vacuum the well underneath, where sand and grit collect. If you carry muddy boots, a dog, garden waste or sports kit, a boot liner lifts out to be shaken or hosed, which is far easier than cleaning carpet. A smell that stays after cleaning is often coming from something soaked into the carpet or the seats. An odour eliminator takes smells out rather than covering them, and the guide to choosing a car air freshener explains the difference.
Questions
How often should I clean the inside of my car?
A quick vacuum of the mats and seats every week or two stops grit wearing into the carpet, and a full clean in the order above every month or so keeps on top of the rest.
Can I use my household vacuum instead?
Yes, if it has a hose, a crevice tool and a brush, and you can get it close enough to the car. A car vacuum is simply smaller and easier to steer around seats and footwells, and does not need a plug.
Will a 12V vacuum flatten the car battery?
It can, if you use it for a long time with the engine off. Keep sessions short, or use a cordless vacuum for a long clean. Do not leave the engine running just to power the vacuum: the Highway Code says you must not leave an engine running unnecessarily while stationary on a public road.
Why has my vacuum lost its suction?
Usually because the bin is full or the filter is clogged. Empty the bin, clean the filter as the instructions say, let it dry, and check that nothing is stuck in the nozzle. A cordless vacuum may also be running low on charge.
What is the quickest way to get dog hair off the back seat?
Wipe the seat in one direction with a damp rubber glove to roll the hair into clumps, then vacuum with a pet hair head. A seat cover or hammock then catches the hair before it gets there.
Where to go next
Start with the car vacuum cleaners, then add gel and brushes and microfibre cloths for the parts a vacuum cannot reach. Everything for keeping the car fresh is under fresh air and cleaning. Delivery is included in every price and tracked to your door. Other guides that help:
- Choosing car floor mats: mats that are easier to keep clean
- Travelling with a dog in the car: keeping hair and mud off the seats in the first place
- Choosing a car air freshener: once the car is clean, keeping it smelling that way
- How to organise your car: a place for everything, so there is less to clear out